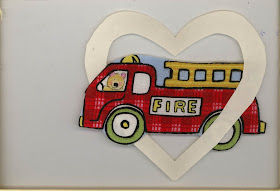
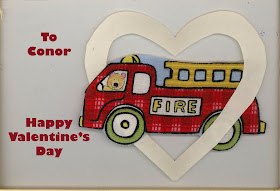
First I made a layout of the fabric motifs, scanned it into Photoshop, and sized it to 4 x 6 inches. ( It has to be reversed on the scanner bed, which was tricky for me at first.)

Then I made a new layer and put in the text I wanted, placing it correctly.

Then I made only the Text layer visible, and fed the pre-treated fabric fused on freezer paper into the printer. This gave me pale blue fabric with red lettering, and no image of course.

Then I fused the fabric motifs into their place on the background, and finished the card as usual. Unfortunately, I forgot to take a picture before I mailed it, but it was very cute. The outline heart was red, of course, and the edges were finished with red zig zag.
You could also print the entire card from Photoshop, making a colored background layer, but I like the combination of sewing and printing.
This process may be blindingly obvious to many people, but it was a breakthrough for me, and didn't strain my very meager knowledge of Photoshop.
P. S. After finishing this post, I remembered that I CAN treat you to a look at the one where the printing smeared so that I had to do it again. So I guess the final lesson of this tutorial is DON'T FORGET TO HEAT SET THE PRINTING.


Cute! Thanks for the tutorial ... especially the part about heat setting. I find it's a lot of fun making valentines for my grandchildren.
ReplyDeletePS: My word verification for this post is "bawling" ... speaking of grandchildren.
Very, very cute. Again, gotta love the trial and error moments.
ReplyDeleteSweet!
ReplyDeleteI still procrastinate pre-treating the fabric and putting it on freezer paper...
Great tutorial, Kay! I can use all the help with Photoshop I can get!
ReplyDeleteCheers!
How clever! And thanks for the reminder about heat setting...
ReplyDeleteWhat a lucky grandson you have - hope he treasures his valentine!
ReplyDelete